With numerous integrations and systems relying on API keys for data exchange, having the right level of control over each access point is essential. NVECTA understands this need, offering robust options to manage multiple API keys within your account. With the option to create, edit, and disable multiple API keys, NVECTA empowers businesses to strengthen security, streamline data access, and control access permissions across multiple applications.
This article explores the benefits and steps involved in managing API keys in NVECTA, covering everything from locating your brand ID and encryption key to creating new keys, setting scopes, editing, and deleting them. Let's dive into how you can optimise your platform's security and flexibility with this valuable feature.
Why use multiple authentication keys?
When using a single API key, all integrations (such as web SDK, Android SDK, and reporting APIs) share the same access credentials. While this default approach can work for many setups, businesses often have distinct applications or third-party vendors accessing data, each requiring unique credentials for added security.
Multiple authentication keys offer key benefits:
- Enhanced security: Different keys can be used for each integration, limiting exposure if one key is compromised.
- Easier management: Keys can be individually disabled or refreshed without affecting other integrations.
- Controlled access: By assigning scopes, you can limit each key's access to specific integrations, ensuring data is shared only where needed.
How to manage API keys in NVECTA
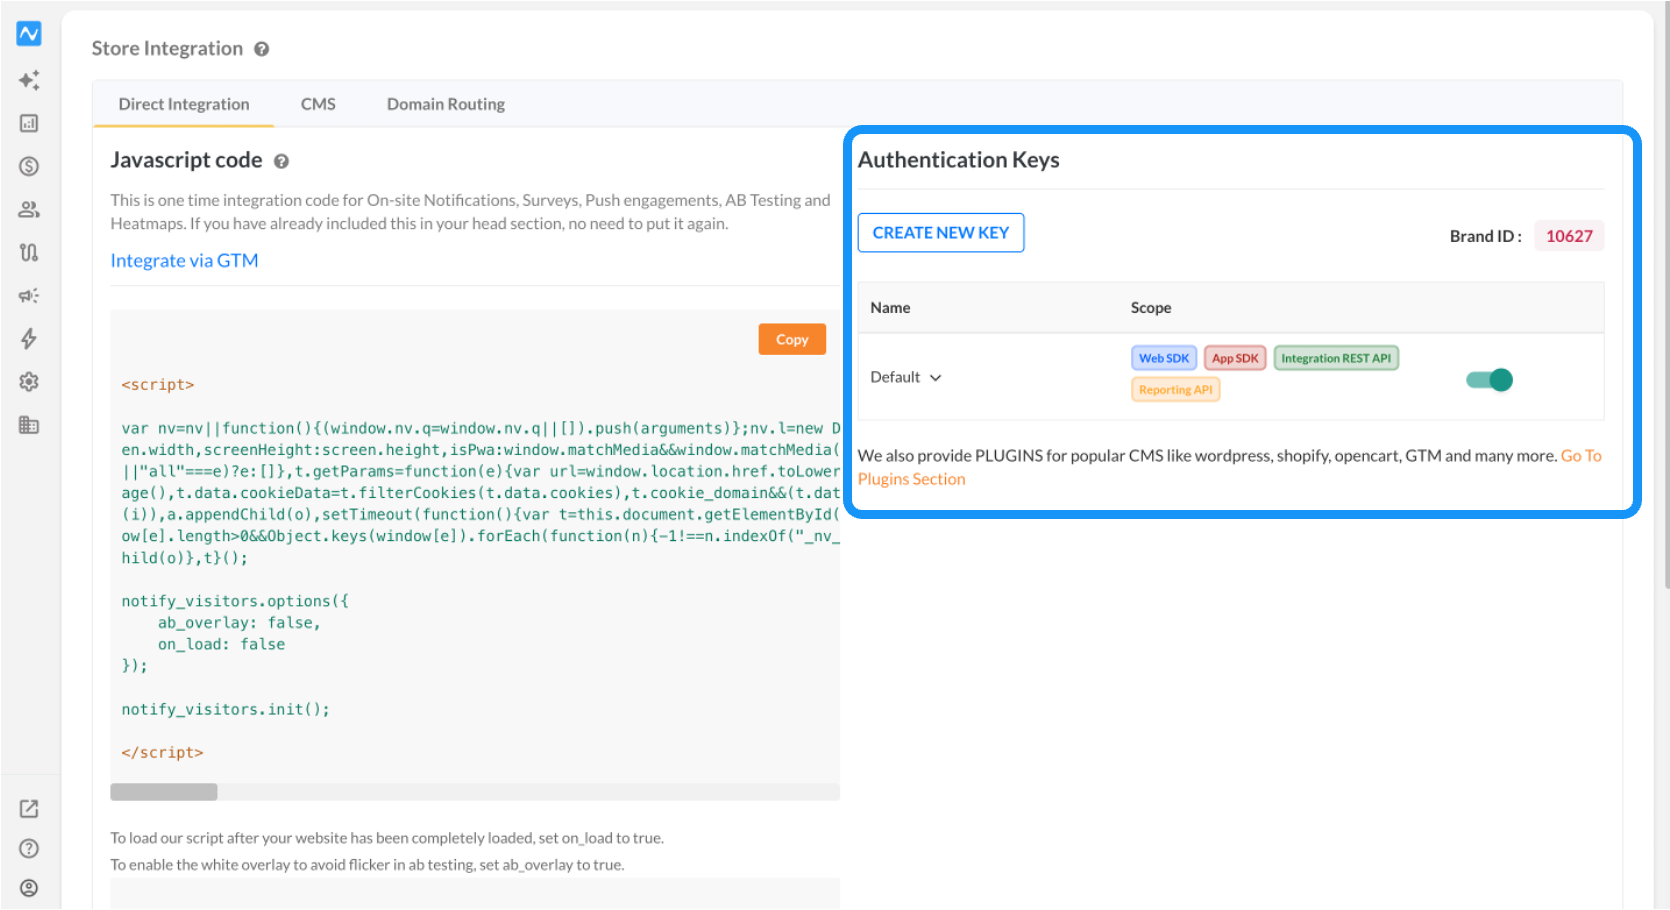
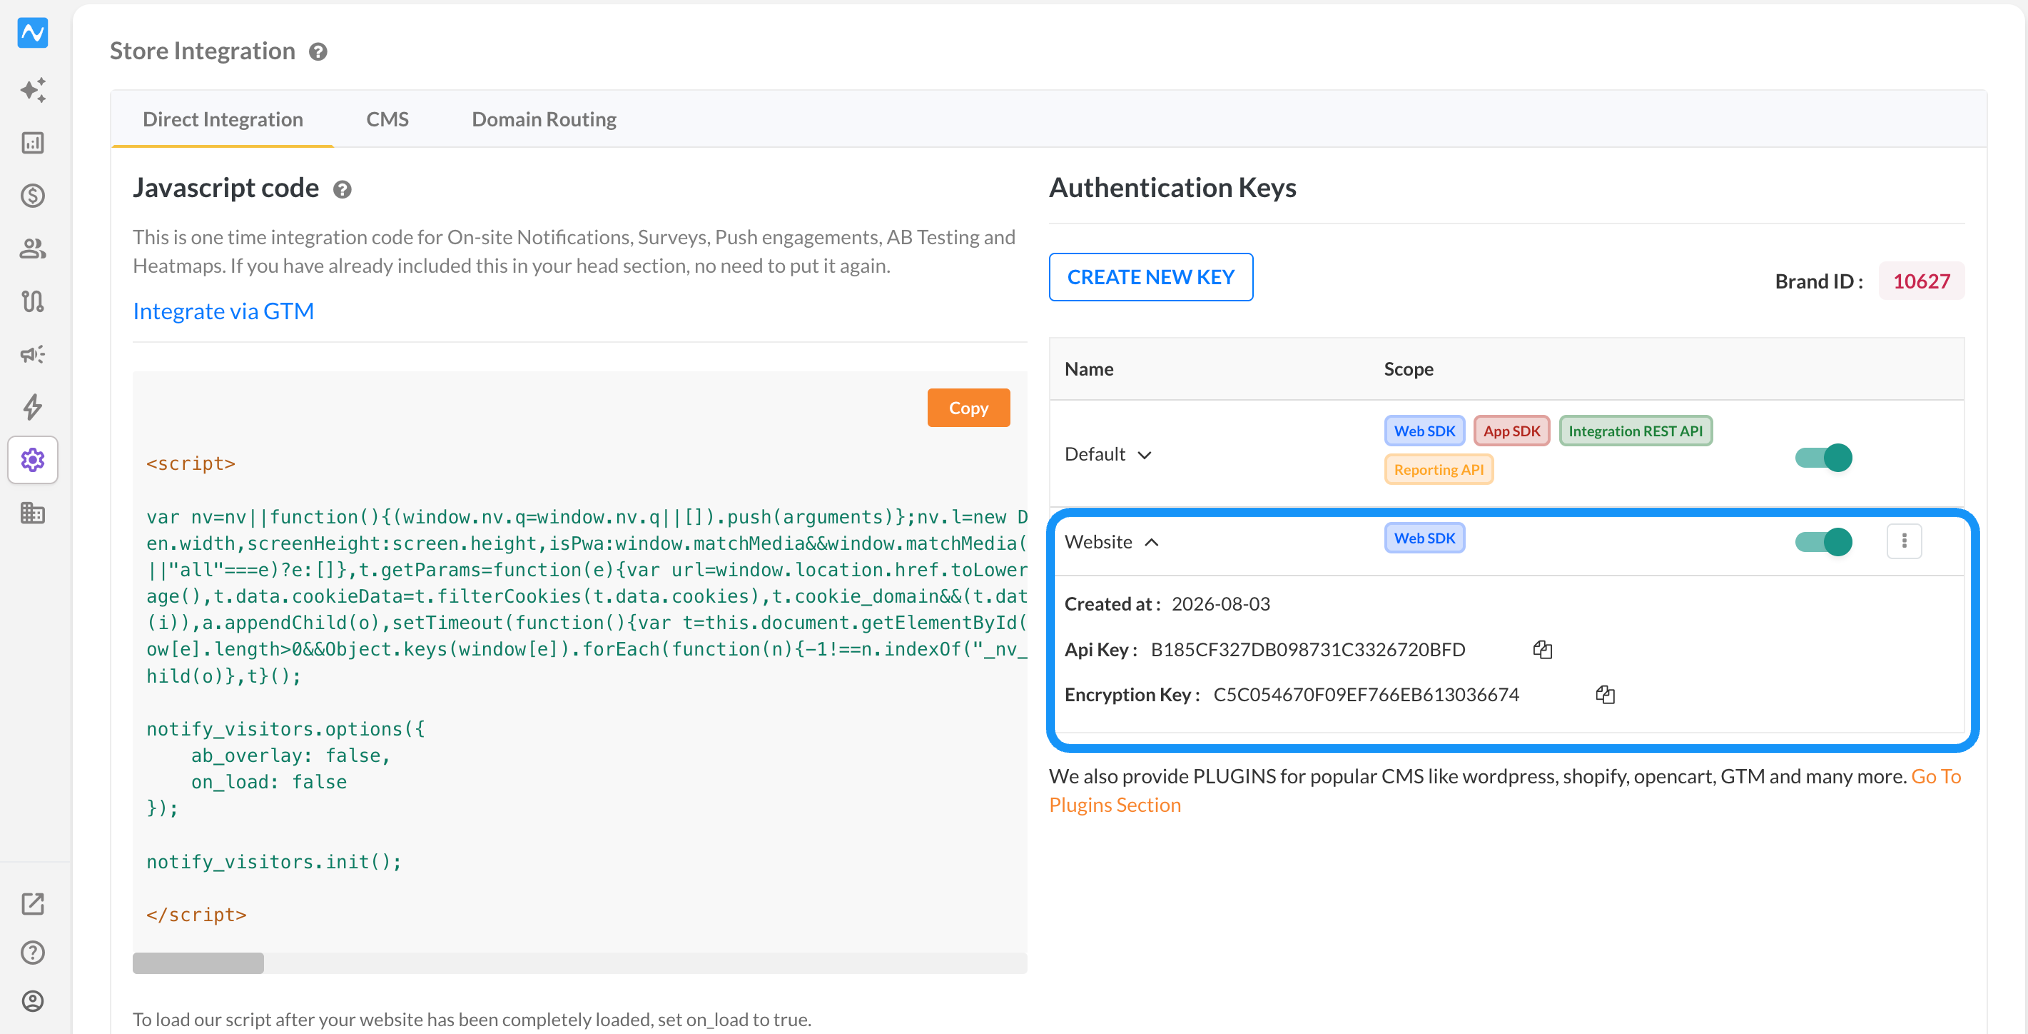
To begin managing API keys, you need to access the NVECTA dashboard and navigate to the 'Settings' section. Within 'Settings', locate and click on the 'Store Integration' section, which is the primary area where API keys are managed. On the 'Direct Integration' tab, the right-hand column is labelled 'Authentication Keys' — this is where your brand ID, API keys, and encryption keys all live.
1. Finding your brand ID
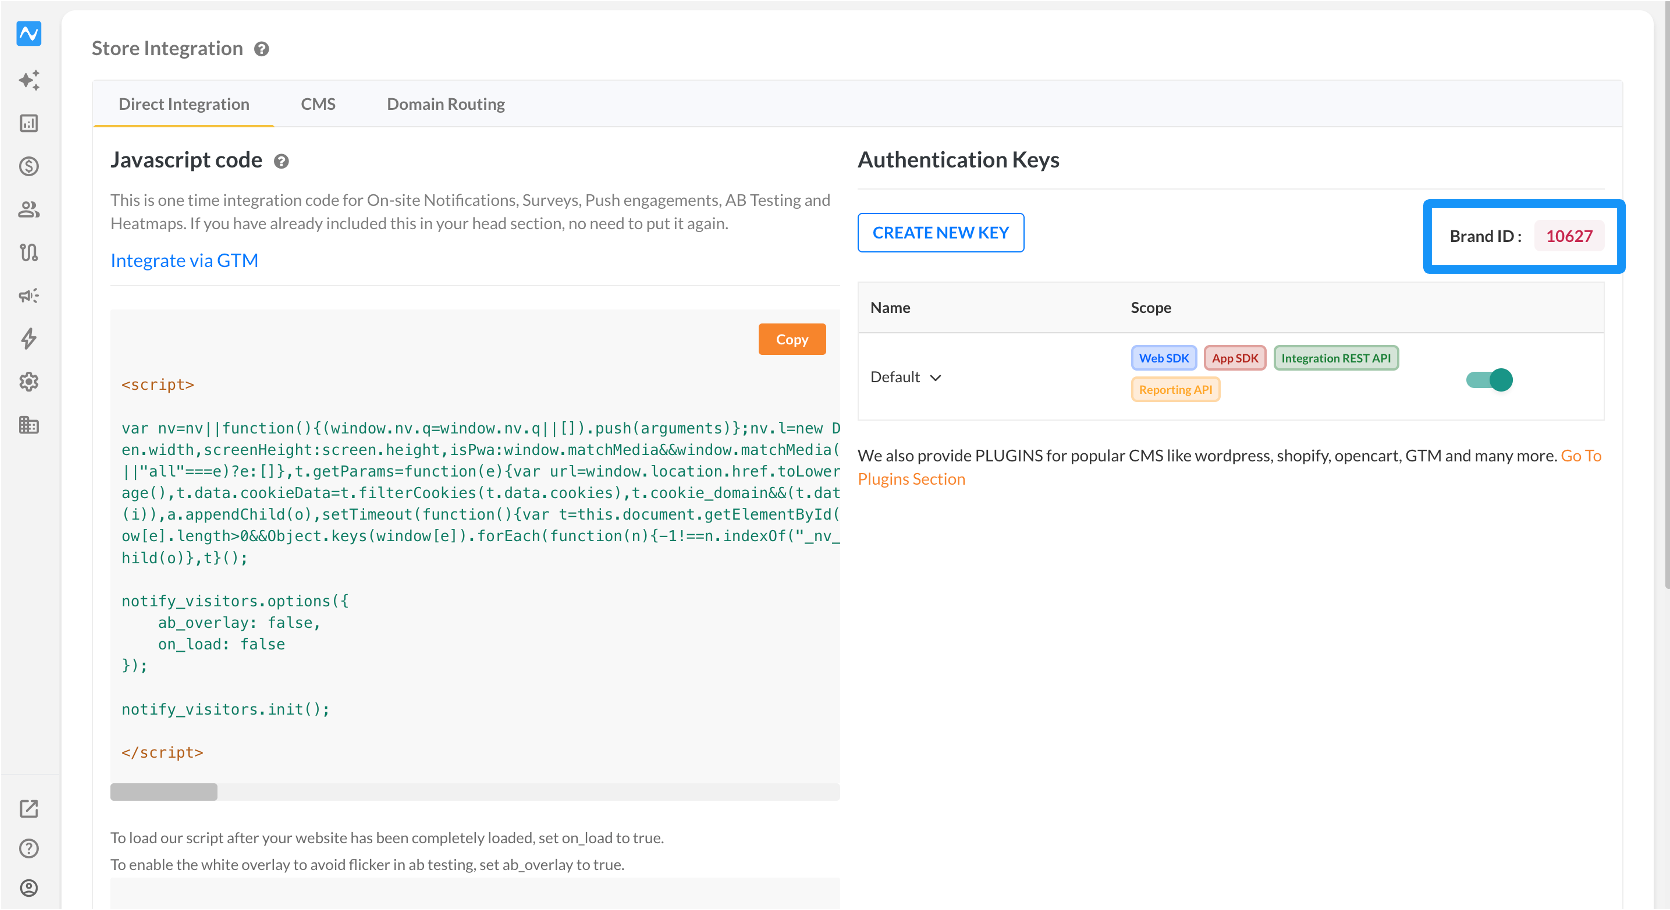
Your brand ID is the unique numeric identifier for your NVECTA account, and several SDKs and API calls require it. You'll find it in the top-right corner of the 'Authentication Keys' panel, displayed as Brand ID: followed by your account's number. Every account has its own brand ID, so if you manage more than one, confirm you're on the correct account before copying the value.
2. Accessing your default API key and encryption key
When you create a new account in NVECTA, a default API Key and Encryption Key are automatically generated. These keys are essential for initial integration. In the keys table, click the arrow next to the key name (for example, 'Default') to expand the row — the API Key appears first, and the Encryption Key appears directly below it. A copy icon sits to the right of each value, so you can click to copy either key for immediate use.
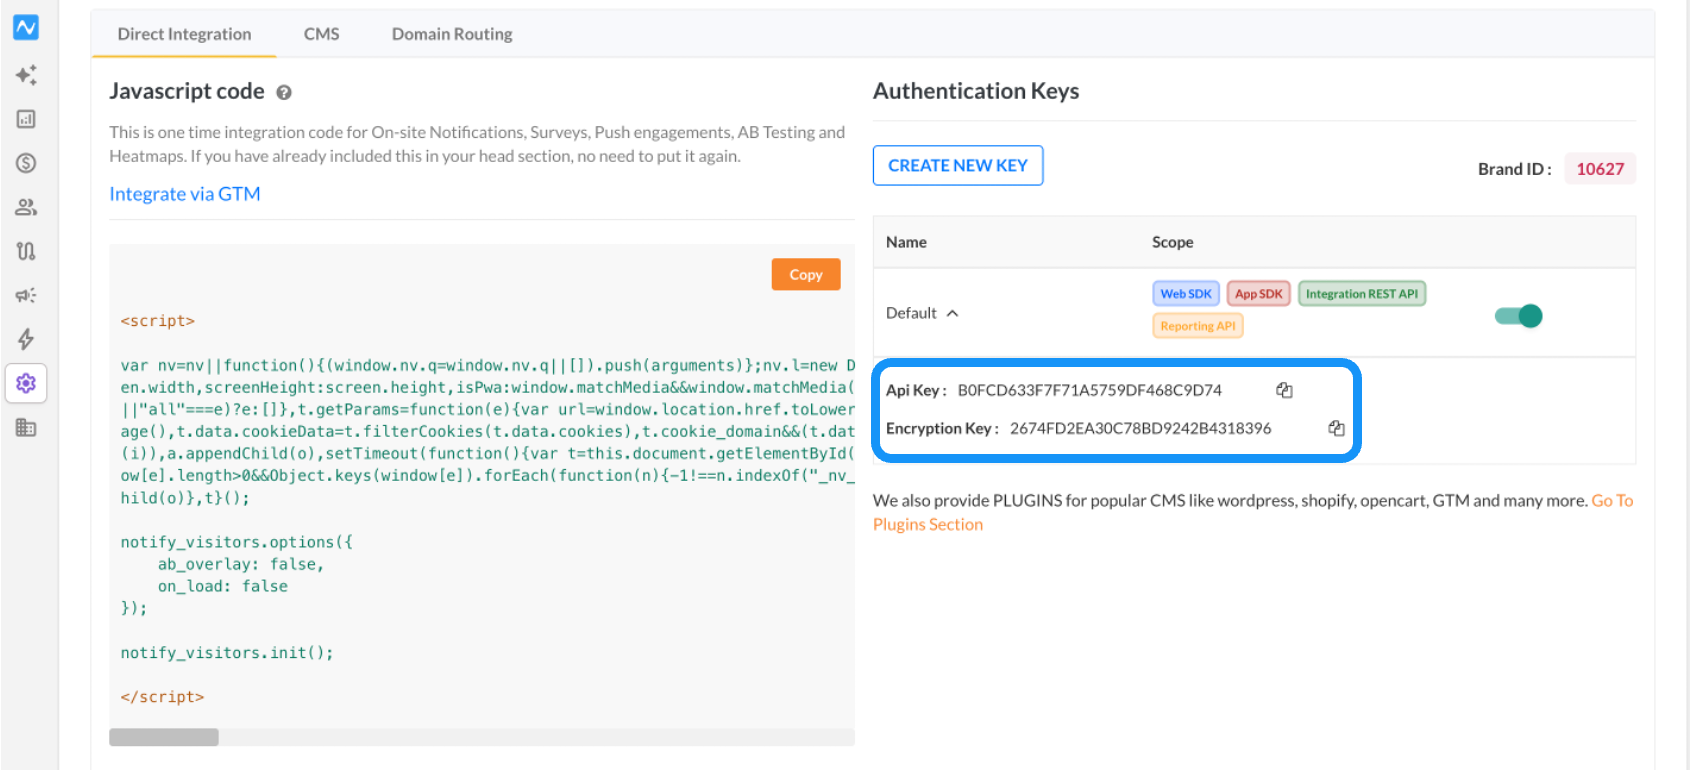
- The encryption key is the key used in front-end scripts such as the Web SDK on your website.
- The API key is a server-side key only: treat it as a private credential and never expose it in front-end scripts, public repositories, or shared documents. It identifies your account, while the encryption key is what authenticates and signs your requests.
3. Creating additional API keys
To create additional authentication keys, click the 'Create New Key' button under the authentication keys section. Clicking this button initiates the key creation process. A pop-up window then appears, prompting you to select the desired scope for the new API key.
First, provide a name for the new key for easy identification, and then choose from the available options, including Web SDK, App SDK, Integration REST API, and Reporting API.
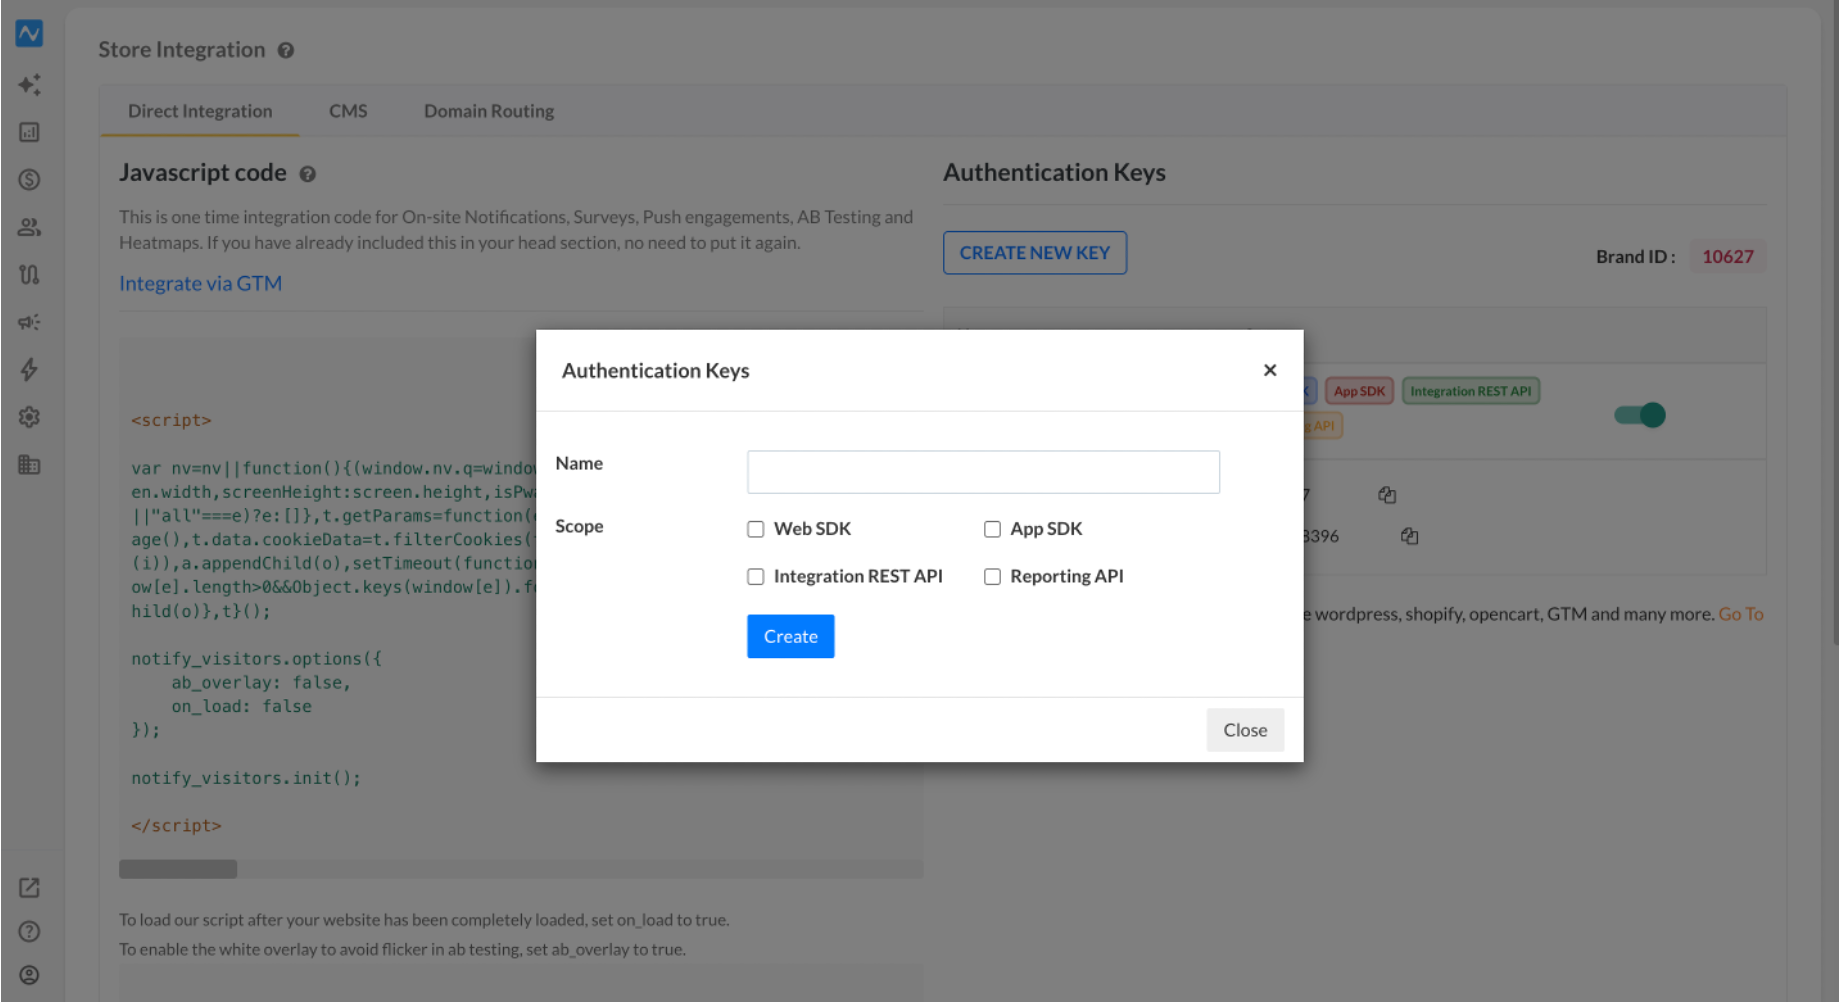
- Web SDK: Integrate NVECTA's features into your website for real-time visitor tracking, notifications, and data collection.
- App SDK: Embed NVECTA within mobile apps to track user behaviour, send push notifications, and collect in-app data.
- Integration REST API: Connect NVECTA with external systems, enabling data synchronisation and automation via API calls.
- Reporting API: Access detailed analytics and performance metrics programmatically for custom reporting and trend analysis.
The newly created API key will appear alongside the default one and any other keys you've created, ready for integration. Each new key comes with its own API key and encryption key pair, visible by expanding that key's row in the same way.
4. Editing, deactivating, or deleting API keys
To further manage your API keys, you can use additional options available next to each API key:
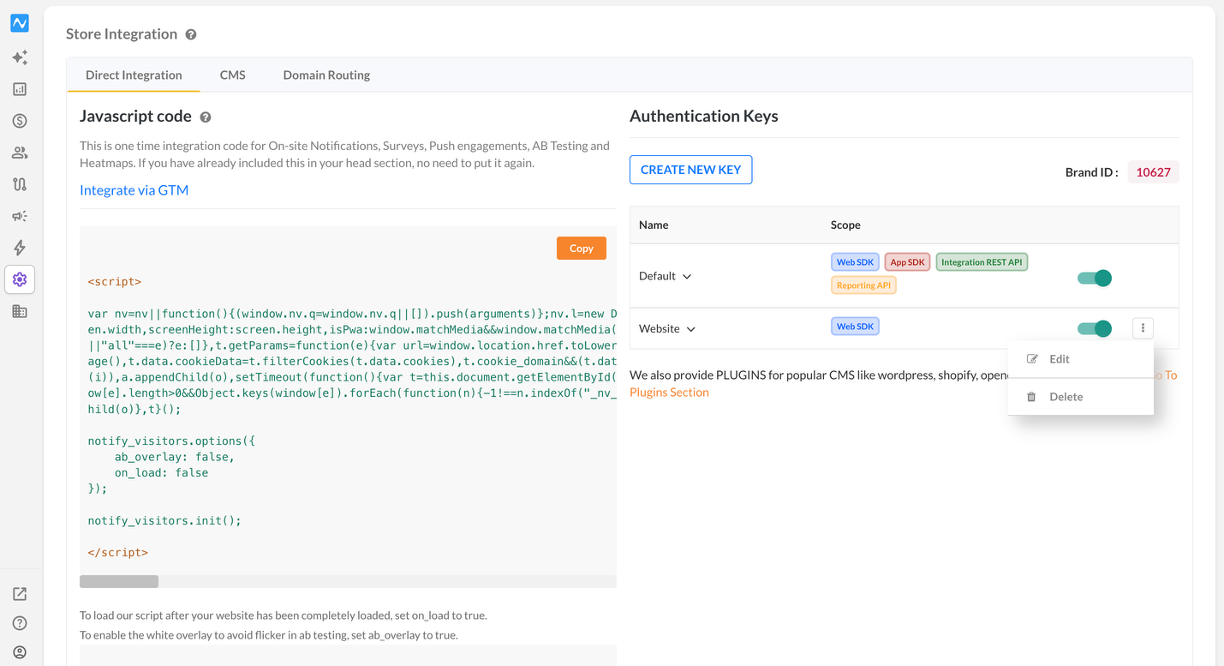
- Enable or disable: Every key, including the default, has an enable/disable toggle on the right side of its row. This allows you to deactivate keys that are no longer in use without deleting them, which may be helpful if you plan to re-enable them later.
- Edit scope: To adjust the scope of an API key, click on the three-dot menu next to the key and select Edit. This will allow you to update the scope and rename the key as needed.
- Delete key: If a key is no longer required, click the three-dot menu and select Delete.
Key limitations
The default key can only be turned on or off; you can't rename it or change its scope. Additionally, the default key cannot be deleted either. Your brand ID is fixed and cannot be changed or regenerated.
NVECTA sets a limit on the number of API keys you can create, allowing up to five new keys beyond the default key. If you reach the limit, an error message will prompt you to delete an existing key before adding a new one.
Was this article helpful?
That’s Great!
Thank you for your feedback
Sorry! We couldn't be helpful
Thank you for your feedback
Feedback sent
We appreciate your effort and will try to fix the article