Not every subscriber wants every email you send. Some want your newsletter but not your offers, others want order updates and nothing else. If the only choice is to unsubscribe from everything, many of them will do exactly that.
Subscription groups give subscribers a middle option. You split your emails into groups, such as Newsletters or Offers, and subscribers choose which groups they want to stay in. This article explains how the unsubscription flow works in NVECTA, how to set up groups and unsubscribe screens, where to see the groups a user has left, and how to send a campaign only to the users who are still in a group.
How subscription groups work
- Subscription group: A category of email that subscribers can opt out of on its own, for example Newsletters or Offers. You create groups in the console, and each one has a name and a short description.
- Preference page: The page a subscriber lands on after clicking the unsubscribe link in your email. It lists your subscription groups so the subscriber can choose which ones to keep.
- Email Subscription Status: The overall email consent of a user, such as Subscribed or Unsubscribed. Leaving one or more groups does not change it. To learn what each status means, see Subscription status for Email, SMS, and WhatsApp.
Part 1: What subscribers see when they unsubscribe
- The subscriber clicks the unsubscribe link in your email.
- The preference page opens and shows every subscription group under My Preferences :, with the groups the subscriber is still in already ticked.
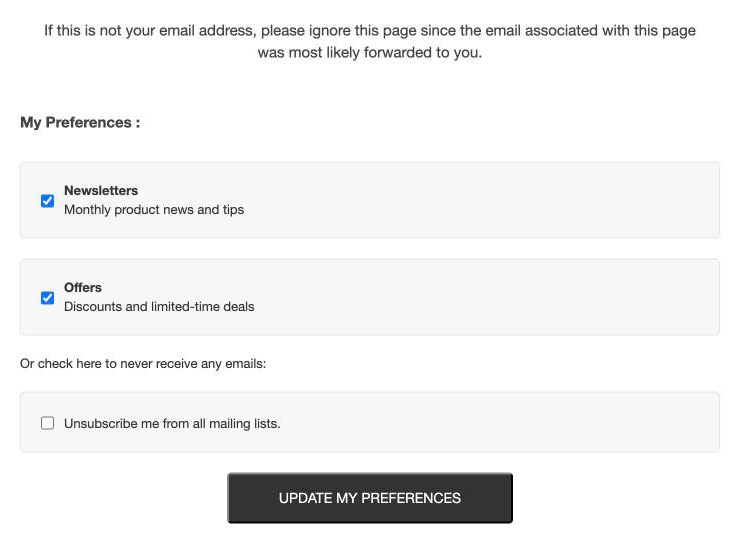
- The subscriber unticks the groups they no longer want, or ticks Unsubscribe me from all mailing lists. to stop all emails.
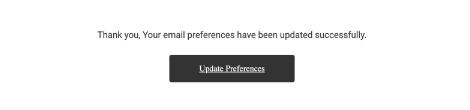
- The subscriber clicks UPDATE MY PREFERENCES. The confirmation screen then opens, with a message that their email preferences have been updated.
For example, a subscriber who wants your newsletter but not your offers unticks Offers, keeps Newsletters ticked and updates their preferences. They keep receiving newsletters, and campaigns sent to the Offers group skip them.
Add the unsubscribe link to your email
The preference page only opens from an unsubscribe link inside the email, so add one to every campaign. Email templates don't always include it.
- HTML editor: Click Unsubscribe Link in the editor toolbar to insert the unsubscribe tag, then add link text such as "Manage preferences" between the tags. For more on the editor, see HTML Email Editor.

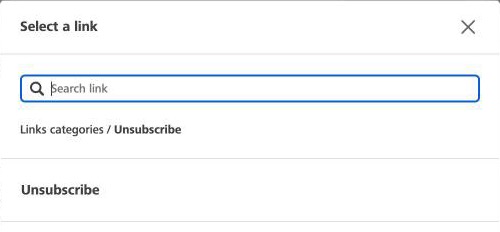
- Drag & Drop Editor: Select the text you want to link and click Special links in the text toolbar. In the Select a link pop-up, click Unsubscribe, then click Unsubscribe again.

Test emails don't replace the unsubscribe tag with a working link. To check the full flow, send the campaign to a segment that contains only your own test user.
Part 2: Create a subscription group
Where: Settings > Email > Preference Pages > Subscription Groups
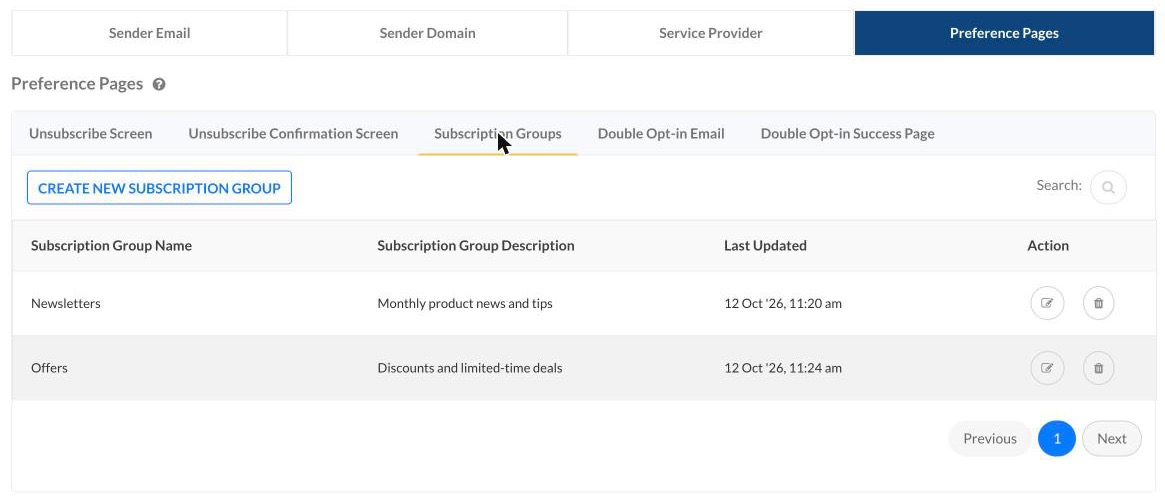
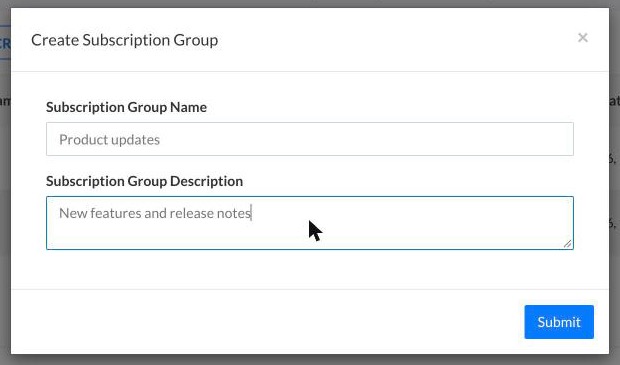
- Click CREATE NEW SUBSCRIPTION GROUP.
- In the Create Subscription Group pop-up, enter a Subscription Group Name, for example "Offers".
- Enter a Subscription Group Description. Subscribers see it under the group name on the preference page, so describe what the group sends, for example "Discounts and limited-time deals".
- Click Submit.
The new group appears in the list with its Subscription Group Name, Subscription Group Description and Last Updated date. Use the Action column to manage it.
Part 3: Customise the unsubscribe screens
Where: Settings > Email > Preference Pages
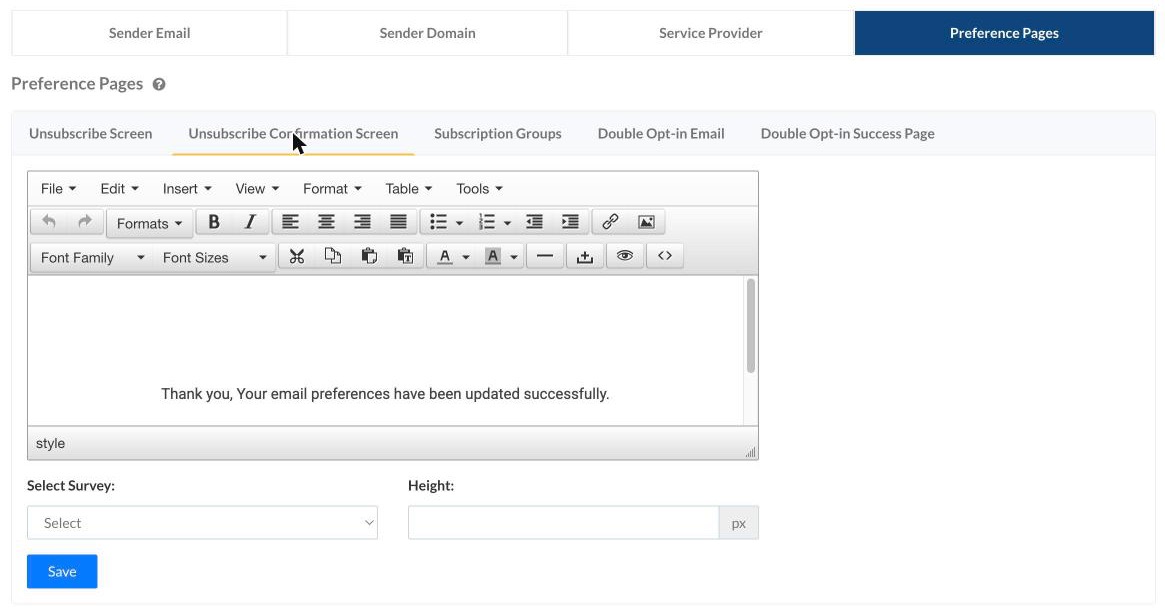
You can change the content of both screens a subscriber sees, using the HTML editor on each tab.
- Unsubscribe Screen: The page where subscribers choose which groups to keep or unsubscribe from everything. Add your own wording, logo or images, then click Save.
- Unsubscribe Confirmation Screen: The page shown after subscribers update their preferences. Besides changing the content, you can add a survey to learn why people unsubscribe: choose it in Select Survey, set its height in Height so it fits on mobile screens, then click Save.
To learn how subscribers can come back after unsubscribing, see Understanding Email Subscription Preferences and Resubscription.
Part 4: Check which subscription groups a user is in
Where: Segments > User One View > user profile > Attributes
- In User One View, search for the user by User ID, NV UID, email, phone or name.
- Click the user's name to open their profile.
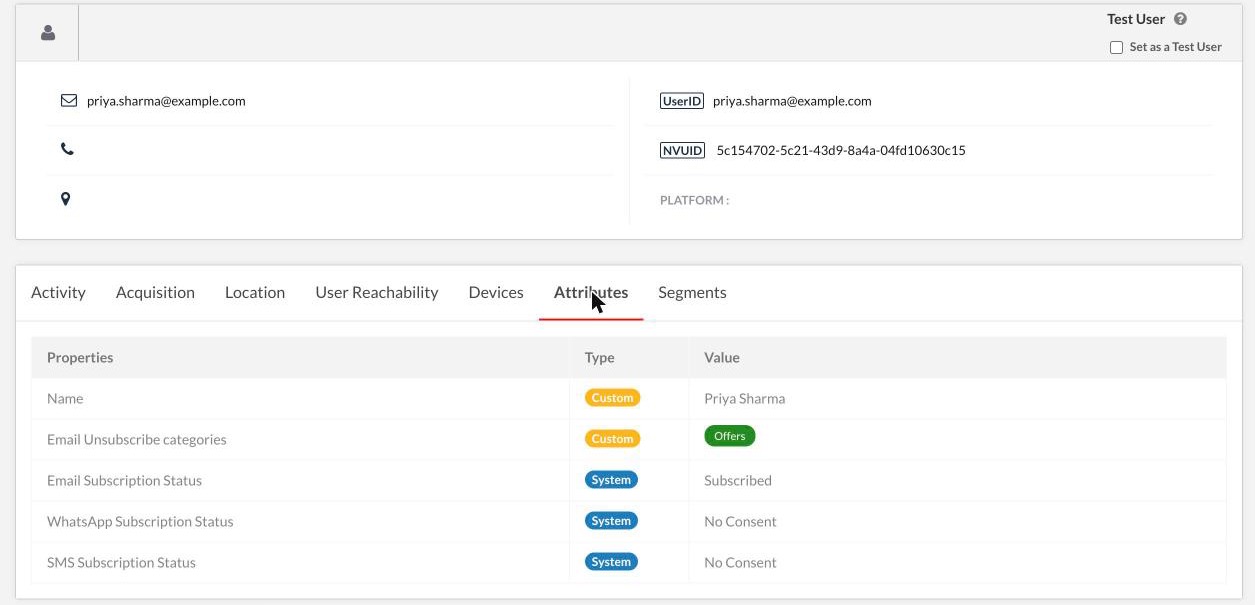
- Open the Attributes tab and find the Email Unsubscribe categories row.
Email Unsubscribe categories lists the groups the user has left, not the groups they are in. The user is still in every group that isn't listed. For example, if your groups are Newsletters and Offers and the row shows Offers, the user receives newsletters but not offers.
- No Email Unsubscribe categories row: The user hasn't left any group, so they are in all of them.
- Email Subscription Status: Shown on the same tab. It stays Subscribed when a user leaves only some groups, and the User Reachability tab still shows email as reachable.
The same tab shows a user's unsubscription from a whole channel. To unsubscribe a user yourself, see Unsubscribe Users.
Part 5: Send a campaign only to users in a subscription group
When you link a campaign to a subscription group, NVECTA skips every user who has left that group, so they don't receive emails they opted out of.
Where: Campaigns > Create campaign > Email > Recipients
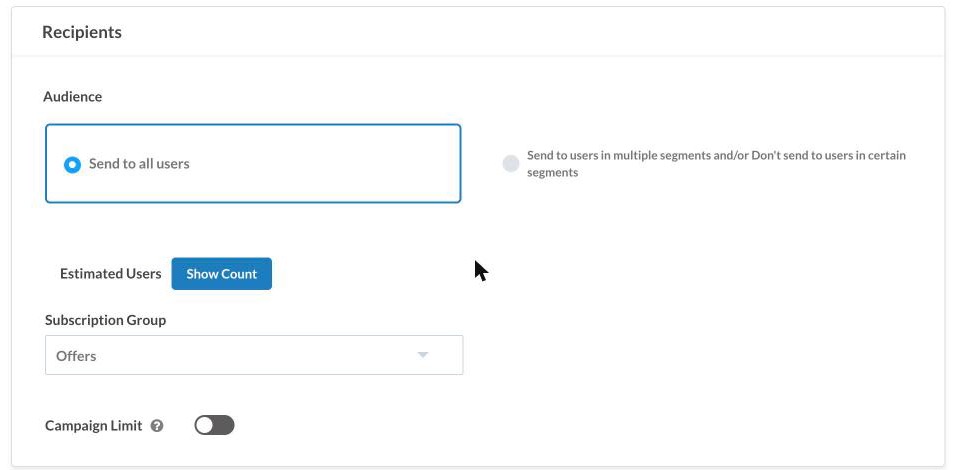
- Under Audience, choose who the campaign is for: Send to all users, or send to or exclude users in specific segments.
- In the Subscription Group drop-down, select the group the campaign belongs to. For example, select Offers for a sale announcement.
- Finish the rest of the campaign as usual. On the Review step, check that Subscription Group under Campaign Info shows the group you selected.
Each campaign can be linked to one subscription group. For the full campaign setup, see How To Create An Email Broadcast Campaign.
Conclusion
Subscription groups let subscribers drop the emails they don't want and keep the ones they do. Create a group for each type of email you send, add the unsubscribe link to every campaign, and link each campaign to its group so that users who left the group are skipped. To see the groups a user has left, check Email Unsubscribe categories on the Attributes tab of their profile.
Was this article helpful?
That’s Great!
Thank you for your feedback
Sorry! We couldn't be helpful
Thank you for your feedback
Feedback sent
We appreciate your effort and will try to fix the article