In this guide, we will explore the process of bulk suppressing user profiles for a specific channel. This feature allows you to efficiently suppress users across email, SMS, and/or WhatsApp channels. Before delving into the details, let's clarify the concept of suppression in NVECTA.
What is a suppressed profile?
When a profile is suppressed for any channel, they will not be able to receive messages. Suppressed profiles will still have their data available in NVECTA, but they won't receive any messages, even if they are included in the segment you've chosen for a broadcast campaign or journey.
Methods of suppression
There are several methods to suppress users from receiving messages.
- When a user unsubscribes: If a user chooses to unsubscribe from receiving email, SMS, or WhatsApp messages, they will automatically be suppressed in NVECTA.
- By system: Our system identifies invalid email addresses or mobile numbers, as well as unengaged users, and automatically suppresses these profiles. Click here to learn more.
- Manual suppression: If you prefer to suppress a profile yourself, you have the option to do so. Learn how to do it by clicking here.
- Manual bulk suppression: If you have a large number of profiles that you want to suppress, you can choose this method.
Bulk suppress profiles
To bulk suppress profiles for a particular channel, follow these steps:
Step 1 - Export profiles from your current vendor
If you are moving to NVECTA from another platform, start by exporting the profiles you want to suppress from your current vendor. Most email, SMS, and WhatsApp platforms allow you to export your contact or subscriber list as a CSV file. Export the email profiles you wish to suppress from your current vendor and download the CSV file so you can prepare it and bring it into NVECTA.
Step 2 - Making changes in the CSV file
Open the downloaded spreadsheet and remove every column except the ones that identify your contacts for the channel(s) you want to suppress — for example, "Email" for email, or the phone number column for SMS and WhatsApp.
Next, add an opt-in column for each channel, using the header "email_opt_in", "sms_opt_in", or "whatsapp_opt_in". If you are suppressing for all three channels, you can include these three headers altogether in same CSV.
In each opt-in column, enter the value that matches the status you want to apply to that profile. Use the table below to choose the correct value:
| Status | Attribute Data Type | Attribute Value |
|---|---|---|
| Unsubscribed (By user) | Integer | 0 |
| Subscribed | Integer | 1 |
| Bounce | Integer | 2 |
| No Consent | Integer | 3 |
| Invalid | Integer | 4 |
| Unsubscribed (Manual Suppress) | Integer | 5 |
Since we want to bulk suppress these profiles, fill in the value 5 — Unsubscribed (Manual Suppress) — in the opt-in columns.

Lastly, save your CSV file.
Step 3 - Import
Now, we need to import this file. To do this, navigate to the settings menu and select the "Upload Users" option. Within this section, choose "Upload User Data" and pick your CSV file. Verify the relevant attributes, and then proceed by clicking "Next". In the next step, you will be prompted to choose a segment, but please note that selecting a segment is not required in this case. Therefore, you can leave it as it is and simply click the upload button.
Allow a few moments for the system to process the upload, and once completed, ensure that the status reflects as "Success."
Checking suppressed profiles
To verify if the user is excluded from a specific channel, navigate to segments and click on the three dots next to the segment used for suppression. From there, choose user logs and click on the user's name. This will open the user's profile. Next, click on attributes to view the user's subscription status for a particular channel. In our situation, we utilised email, so the email subscription status is displayed as unsubscribed.
Unsuppressing profiles
If you want to resume sending messages to suppressed profiles, you will need to unsuppress or resubscribe them. The process to do this is similar to what was mentioned earlier, with one small difference. Instead of filling in the value 5 in the opt-in column of your spreadsheet, you will need to fill in the value 1 — Subscribed.
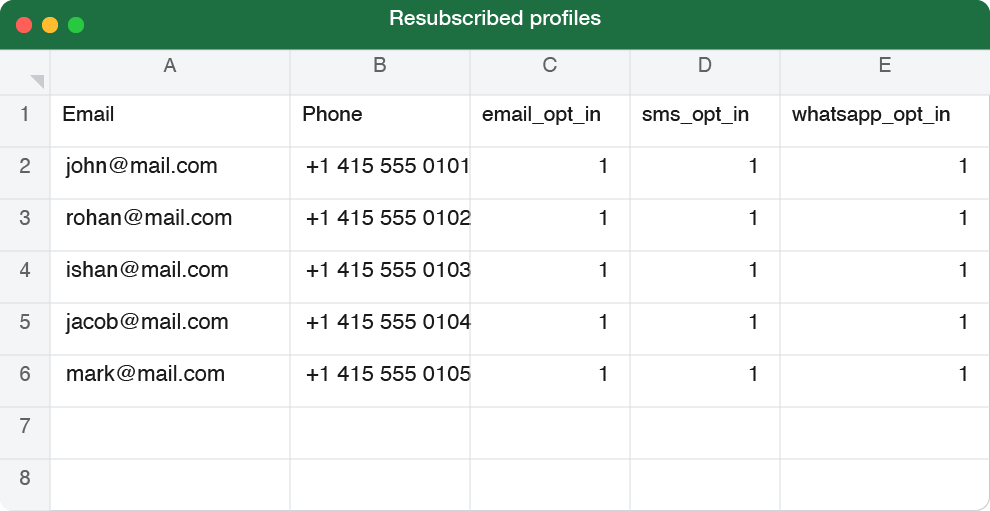
Once you have made the necessary changes, save the sheet and upload it.
To check the status, go to the attributes section of the user's profile, as mentioned above. Here, you will now see that the channel status has returned to subscribed. From now on, all the users that you have unsuppressed will start receiving your messages.
Suppressing profiles that already exist in NVECTA
The steps above are ideal when you are bringing profiles in from another vendor. However, if the profiles you want to suppress already exist in NVECTA — for example, you want to suppress users who haven't interacted with your emails, or you uploaded blacklisted email profiles as "subscribed" — you can export them directly from NVECTA instead. The rest of the process stays the same.
Step A - Create a segment
In order to suppress profiles in bulk, the first step is to create a segment of the users you wish to suppress. For instance, if you want to suppress users who haven't interacted with your emails, you can create a segment with this criteria. The same process can be followed for SMS and WhatsApp as well.
Once you have created your segment, you can navigate to the segments section and locate the segment you just created. To perform bulk suppression, you will need to export the user logs of this segment, make the necessary modifications to the exported sheet, and then import the sheet back into NVECTA.
Step B - Export user logs as CSV
To export user logs, simply locate the three-dotted ellipses icon located next to your created segment. From there, select "user logs" to proceed. Afterward, click on the export button situated at the top right corner of the screen. Enter your email address where you wish to receive the user logs list, and click on the export data option.
Please allow 1-2 minutes for the process to complete. Once finished, you will receive an email containing a link to download the user logs. Access your email and click on the provided link to initiate the download of the user logs CSV file.
Once you have the CSV file, follow the same steps described above — make your changes in the CSV file (Step 2) and import it (Step 3).
Conclusion
We've just covered two ways to bulk suppress user profiles for a specific channel. If you are migrating to NVECTA from another platform, you can import your historic blacklisted profiles directly from your current vendor and bring them in already marked as suppressed — so the contacts you previously excluded never start receiving messages again. And if the profiles already exist in NVECTA, you can export them from a segment and suppress them in the same way. In both cases, the CSV preparation and import steps remain identical.
In particular, we recommend importing the list of contacts that were previously identified as invalid, hard bounced, or unsubscribed by your existing email, SMS, or WhatsApp service provider. This helps ensure that messages are not sent to known invalid or unwilling recipients, protecting your sender reputation and improving deliverability across all your channels.
Suppressing profiles is highly recommended over deleting them entirely. When you suppress a profile, all user data is retained, ensuring comprehensive information is at your disposal while preventing them from receiving messages. This strategic approach allows for future re-engagement by simply unsuppressing these profiles. On the contrary, if a profile is deleted, all associated data is permanently removed.
In case you're dealing with a substantial amount of data, please be patient, as exporting and uploading lists may take a few minutes. If you encounter any issues during this process, we encourage you to raise a ticket or reach out to our dedicated support team for assistance.
Was this article helpful?
That’s Great!
Thank you for your feedback
Sorry! We couldn't be helpful
Thank you for your feedback
Feedback sent
We appreciate your effort and will try to fix the article